在 OS X 上打开第三方 SSD Trim 支持
最近对我那台2012年中的13寸 MacBook Pro 动了点手术:
- 升级了内存到16G(官方说明最大8G,但是实际上16G是可以支持的)。
- 改造了光驱位,移除了光驱,加装了一块 SSD(把我之前做 Windows To Go 的 SSD 装上去了)。
放几张图: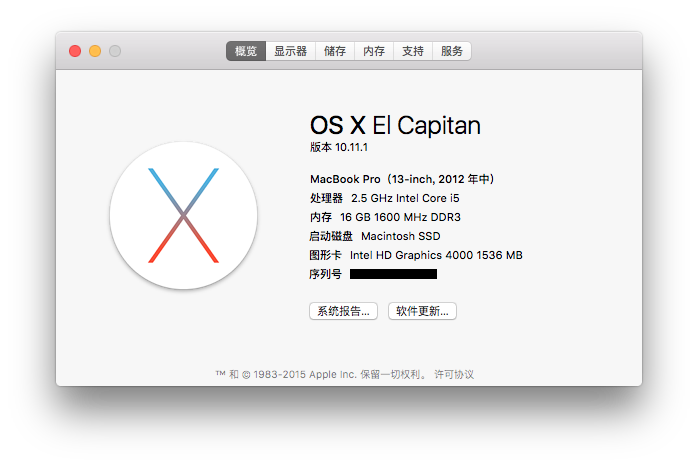
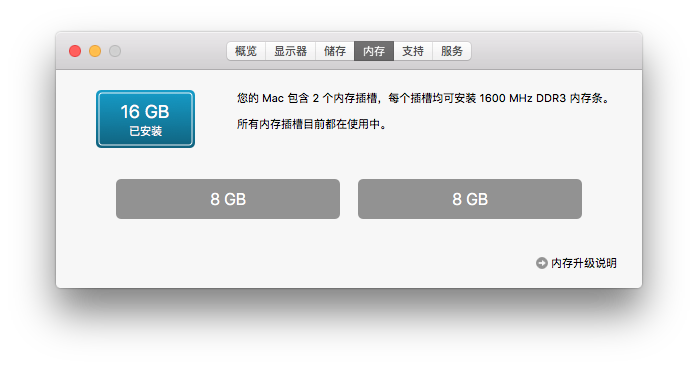
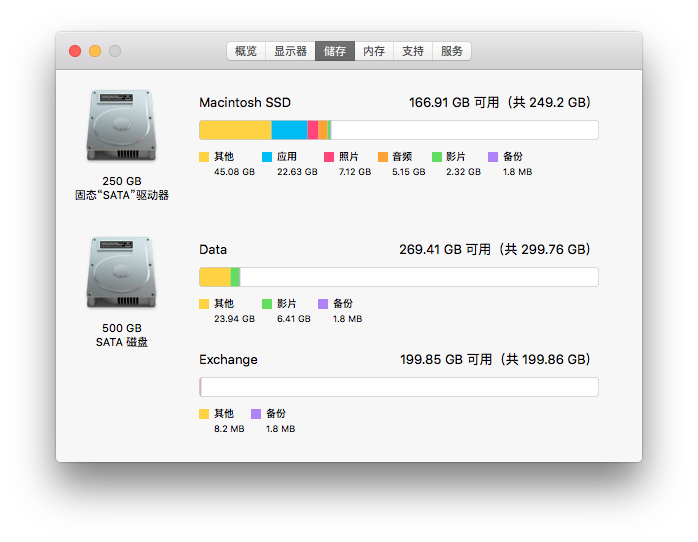
既然装了 SSD,就不得不提一下 Trim。
The Trim command is designed to enable the operating system to notify the SSD which pages no longer contain valid data due to erases either by the user or operating system itself. During a delete operation, the OS will mark the sectors as free for new data and send a Trim command to the SSD to mark them as not containing valid data. After that the SSD knows not to preserve the contents of the block when writing a page, resulting in less write amplification with fewer writes to the flash, higher write speed, and increased drive life.
Trim 是一条 ATAPI 命令,用来通知 SSD 指定页面的数据已经不再需要,避免 SSD 写入放大,提升 SSD 的寿命。
SSDs store data in flash memory cells that are grouped into pages typically of 4 to 16 kB, grouped together into blocks of typically 128 to 512 pages, e.g., 512 kB per block with 4 kB pages in 128-page blocks. NAND flash memory cells can only be directly written to when they are empty. If they may contain data, the contents must be erased before a write operation. An SSD write operation can be done on a single page but, due to hardware limitations, erase commands always affect entire blocks; consequently writing data to empty pages on an SSD is very fast, but slows down considerably once previously written pages need to be overwritten. Since an erase of the cells in the page is needed before it can be written again, but only entire blocks can be erased, an overwrite will initiate a read-erase-modify-write cycle: the contents of the entire block are stored in cache, then the entire block is erased from the SSD, then the overwritten page is written to the cached block, and only then can the entire updated block be written to the flash medium. This phenomenon is known as write amplification.
写入放大则是由于 SSD 的物理限制,写入必须在一个空白的页面上进行,但是擦除操作又必须在整个区块(包含很多个页面,通常是128个4 kB的页面组成一个512 kB的区块)上进行,导致如果 SSD 不知道哪些区块的数据不再需要,在改写数据的时候,SSD 几乎一定需要执行这样一个过程:读取整个区块到缓存、擦除整个区块、改写缓存数据、写入整个区块,而目的可能仅仅是要改写一个页面的内容,这样引起的百倍级别的写入增加,就是写入放大。
Trim on OS X
从10.10.4开始,苹果开始支持第三方 SSD Trim。 在次之前,Apple 对于第三方 SSD Trim 的策略有过几次变更,Mac 圈关于此也已经经历过了无数讨(ma)论(zhan)。最终 Apple 还是允许了第三方 SSD 在 OS X 上开启 Trim。
开启 Trim
开启 Trim 只需要一条命令。sudo trimforce enable
在终端中执行此命令,然后会显示 Apple 的警告,大意为在现有的磁盘上开启 Trim 并没有经过数据完整性的测试, Apple 对开启 Trim 后可能导致的数据损坏和其他损失不承担责任,同时建议你不要在生产环境或者商业用途的设备上开启 Trim。
输出完警告之后,命令会提示你如果需要开启 Trim,输入y。
然后会提示开启 Trim 之后系统将立即重启,再次输入y,就会开启 Trim,然后自动重启系统。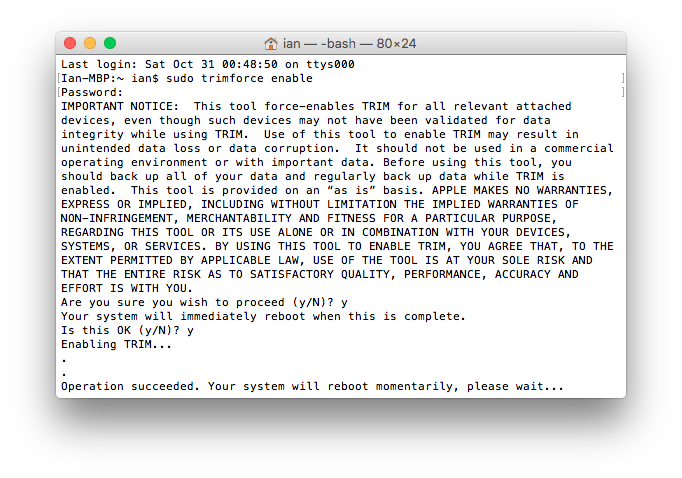
确认 Trim 已经开启
打开“关于本机”,在“概览”中点击“系统报告”,在弹出的新窗口左边选中 “SATA/SATA Express”,在右边找到你的 SSD,选中之后查看下面的 “TRIM 支持”,如果为“是”,就表示已经开启了 Trim。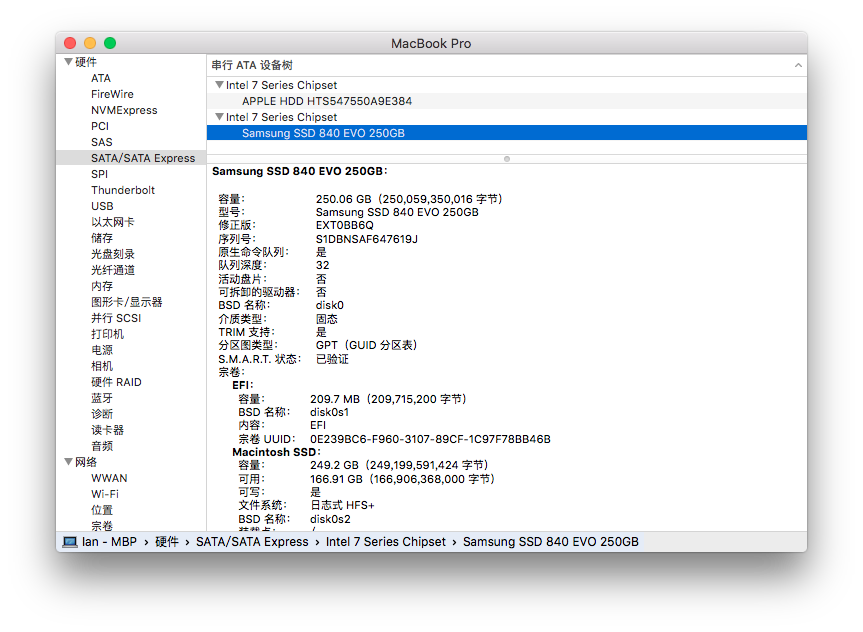
讲个笑话
知乎上有个问题,“有哪些不必要开启Trim的SSD?”,链接里的这条答案是:“公司报销的SSD”。